If you’re a fan of everything that makes a classic Philly cheesesteak so irresistible—tender beef, melty cheese, sautéed peppers, and onions—but wish it could be in a bite-sized, party-perfect form, then Philly cheesesteak sliders are about to steal the show. These little sandwiches are perfect for game days, potlucks, weeknight dinners, or a casual weekend snack. Imagine all the bold flavors of a Philly cheesesteak packed into a buttery, toasted mini roll—gooey, meaty, cheesy, and straight-up delicious right out of the oven.
I made Philly cheesesteak sliders for the first time during a family gathering, and they were gone in minutes! They’re so easy to whip up, and they make a big impact at any event. In this guide, I’ll show you how to make Philly cheesesteak sliders from scratch, share the best beef and cheese combos, and give you fun variations to try. Whether you’re feeding a crowd or just making dinner a little more exciting, these sliders deliver massive flavor in a small, portable package.
Table Of Contents
What Are Philly Cheesesteak Sliders?
🥪 A Mini Twist on the Classic Philly Cheesesteak
Philly cheesesteak sliders are exactly what they sound like—mini sandwiches inspired by the legendary Philly cheesesteak. But instead of a long hoagie roll, these sliders are made with soft, fluffy slider buns or Hawaiian rolls, which makes them perfect for sharing, serving at parties, or snacking during game day.
The key to these sliders is the classic combo of thinly sliced beef (often ribeye or deli roast beef), sautéed bell peppers, onions, and gooey provolone or mozzarella cheese. When all of this is layered between buttery buns and baked to golden perfection, you get the perfect bite-sized version of the classic sandwich.
💡 What Sets Them Apart from Regular Sliders
While many sliders focus on mini burgers or pulled meats, Philly cheesesteak sliders stand out because they combine the bold, savory flavors of a cheesesteak sandwich with the soft, buttery texture of baked sliders. Here’s what makes them truly special:
- Cheese melt factor: Provolone or mozzarella melts beautifully and stretches when you pull these sliders apart, making every bite extra indulgent.
- Sweet & savory combo: The caramelized onions and soft rolls balance out the rich, beefy flavor, creating the perfect harmony of flavors.
- One-pan bake: These sliders are assembled and baked together in one pan, making prep and cleanup a breeze.
Once you try these Philly cheesesteak sliders, I’m sure they’ll become a regular in your menu rotation! They’re simple, flavorful, and always a crowd favorite.
Ingredients You’ll Need for Philly Cheesesteak Sliders
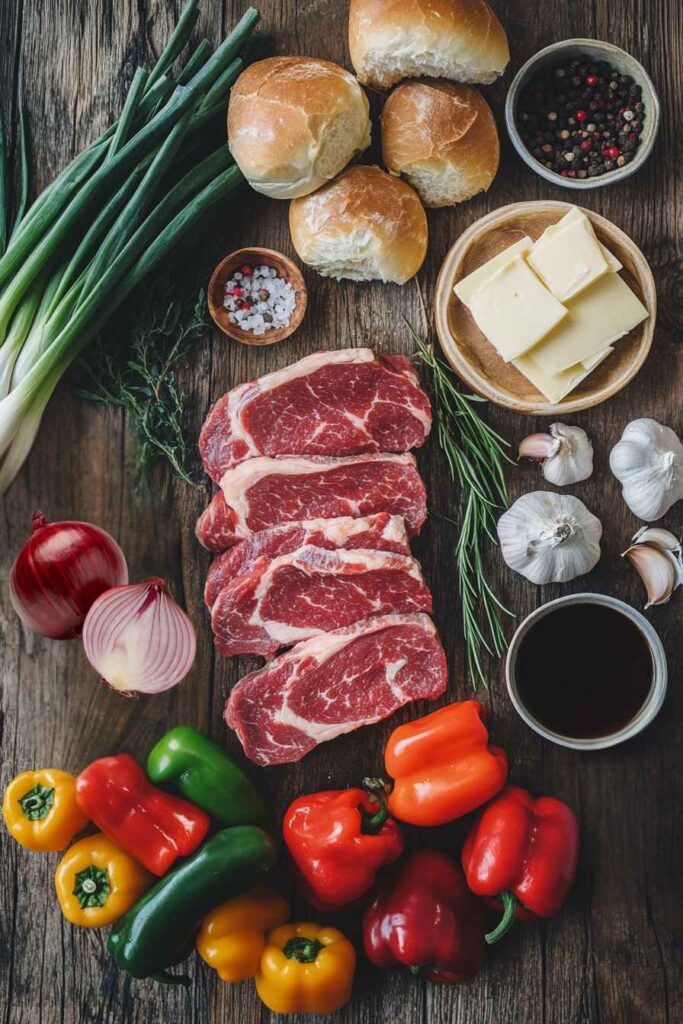
Building the perfect Philly cheesesteak sliders starts with simple, flavorful ingredients. The goal? Recreate that classic cheesesteak taste in a portable, cheesy, oven-baked version that melts in your mouth.
Here’s what you’ll need:
🥩 Thin-Sliced Beef (The Heart of the Slider)
Traditionally, Philly cheesesteaks are made with thinly sliced ribeye, known for its rich flavor and tenderness. If ribeye isn’t available, here are some great options:
- Deli-style roast beef (thinly sliced, not overly seasoned)
- Shaved steak (available pre-sliced at many grocery stores)
- Sirloin or flank steak, sliced very thin against the grain
- Ground beef (for a more budget-friendly, kid-friendly variation)
🧀 Cheese – The Gooey Essential
Cheese brings that irresistible melt and creamy flavor that defines cheesesteak sliders. Here are your best choices:
- Provolone cheese – mild, creamy, and melts beautifully
- Mozzarella – great melt and stretch factor
- American cheese – ultra creamy and traditional
- Cheez Whiz – for a classic Philly street-style twist
🫑 Vegetables – Classic Peppers and Onions
The sweet and savory mix of sautéed veggies adds texture and flavor contrast to the beef and cheese.
- Green bell peppers – traditional for Philly cheesesteaks
- Red or yellow bell peppers – for sweetness and color
- Onions – yellow or white work best
- Garlic – minced, optional, for extra depth
🍞 Buns – The Slider Foundation
Your choice of bread makes a big difference in texture and taste. Look for soft, slightly sweet rolls that can hold all the melty goodness without falling apart.
- Hawaiian rolls – sweet, soft, and perfect for pull-apart style
- Slider buns – buttery and slightly firm for structure
- Mini brioche buns – rich, slightly eggy flavor
Keep the rolls connected when assembling—this helps them bake together perfectly and pull apart cleanly.
🧈 Extras & Flavor Boosters
Elevate your sliders with a few flavorful finishing touches:
- Butter – melted and brushed on the tops for a golden crust
- Worcestershire sauce – adds savory umami to the beef
- Beef broth – for extra moisture when cooking the meat
- Salt & black pepper – to taste
- Optional herbs – parsley, thyme, or Italian seasoning for extra aroma
🍝 Love that Philly cheesesteak flavor in different forms?
Try our Philly Cheesesteak Pasta — a creamy, cheesy skillet meal that transforms your favorite sandwich into a comforting pasta dish!
Step-by-Step Recipe – How to Prepare Philly Cheesesteak Sliders
Imagine biting into a golden, buttery slider filled with tender, juicy beef, sautéed peppers, caramelized onions, and oozing melted cheese—sounds delicious, right? Making these Philly cheesesteak sliders is simpler than you might think, and with this step-by-step guide, you’ll be able to whip up this savory, comforting dish in no time. Whether you’re feeding a hungry crowd or enjoying a cozy family dinner, these sliders are sure to steal the show.
🔥 Step 1: Sauté the Peppers, Onions & Garlic
Start by warming a tablespoon of oil or butter in a large skillet over medium heat. The moment the butter melts, you’ll smell that rich, savory aroma filling your kitchen. Add the sliced bell peppers and onions, cooking them for about 6–8 minutes until they soften and start to caramelize, turning golden-brown. The sweetness of the onions pairs perfectly with the slight crunch of the peppers, giving your sliders that signature cheesesteak flavor.
For an extra punch of flavor, stir in some minced garlic during the last minute of cooking. Just be careful not to let it burn—it only takes a minute for the garlic to infuse its fragrant aroma into the veggies.
🥩 Step 2: Cook the Beef with Flavor Boosters
Now, push the veggies to one side of the skillet and add your thin-sliced beef—ribeye, shaved steak, or roast beef all work beautifully. Season it with salt, pepper, and a splash of Worcestershire sauce, which will deepen the flavor and give that savory umami kick. Cook the beef for about 4–5 minutes, until it’s just browned and fully cooked. If you’re using deli roast beef, make sure to warm it gently so it doesn’t dry out.
For added juiciness, pour a splash of beef broth into the skillet. This keeps the beef flavorful and moist, ensuring each bite is bursting with goodness.
Pro Tip: Once both the beef and veggies are cooked, mix them together in the pan so the flavors meld beautifully. This step ensures that every bite of your Philly cheesesteak sliders is packed with all those rich, savory flavors.
🍞 Step 3: Prep the Slider Rolls
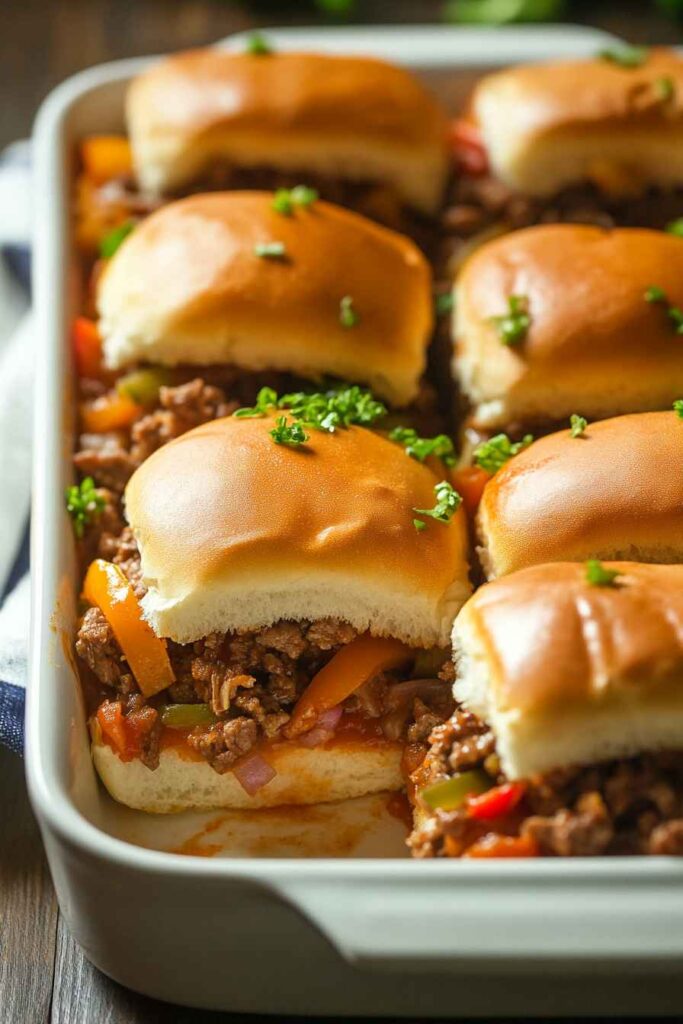
Take your slider buns and, without separating them, slice them horizontally into two large slabs—one top and one bottom. Place the bottom half in a baking dish. For a bit of extra flavor, brush the bottoms lightly with melted butter or drizzle them with some of the delicious beef juices from the pan. Keeping the buns attached makes the sliders so much easier to assemble and bake.
🧀 Step 4: Layer the Filling & Cheese
Now it’s time for the fun part: layering your Philly cheesesteak sliders for maximum flavor and melty goodness. Start by spreading half of the cheese slices over the bottom buns. Then, spoon the hot, beefy veggie mixture on top, making sure to spread it evenly. Place the remaining cheese slices on top of the meat, then cover with the top half of the buns.
The double layer of cheese is key—it ensures everything sticks together and melts beautifully, giving you that signature gooey, stretchy cheese pull in every bite.
🧈 Step 5: Butter the Tops & Bake
Lightly coat the tops of the slider buns with melted butter for a rich, golden finish. For extra flavor, sprinkle on some garlic powder, Italian seasoning, sesame seeds, or flaky sea salt.
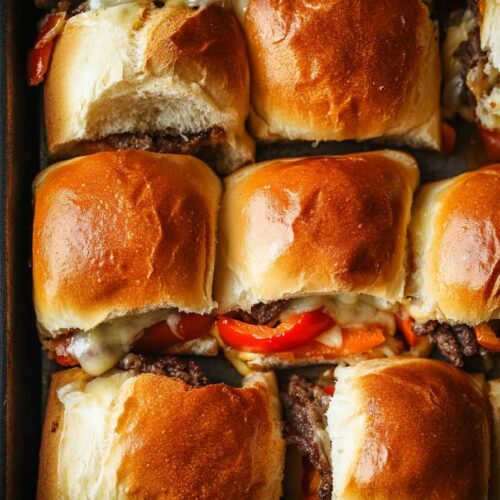
Loosely cover the sliders with foil and bake at 350°F (175°C) for 10 minutes. Remove the foil and continue baking for another 5–7 minutes, or until the tops are nicely browned and the cheese is fully melted and bubbling.
🍽 Step 6: Slice & Serve Warm
Once the sliders are done, let them rest for a couple of minutes before slicing between the rolls. Serve them warm and fresh—there’s nothing like sinking your teeth into a cheesy, beefy, melt-in-your-mouth bite.
These Philly cheesesteak sliders are best enjoyed straight from the oven, with that perfect crispy top and gooey cheese inside. It’s the kind of dish that’s guaranteed to impress and make everyone want seconds.
🥭 Craving something tropical to sip alongside your sliders?
Don’t miss our Cranberry Mocktail — it’s fruity, vibrant, and the perfect non-alcoholic drink to refresh your taste buds between cheesy bites.
Best Types of Beef for Sliders
The foundation of any great philly cheesesteak sliders is, of course, the beef. Choosing the right cut and slicing it correctly will give your sliders that authentic flavor and texture Philly fans love.
Let’s take a look at the best beef options and how to achieve the best results in your kitchen..
🥩 Why Ribeye Is the Gold Standard
Ask any Philly native, and they’ll tell you—ribeye steak is the classic choice for an authentic cheesesteak. It’s rich in marbling, tender when cooked properly, and delivers deep, beefy flavor that holds up beautifully to cheese and onions.
Tips for using ribeye:
- Freeze the steak for 15–20 minutes to make slicing thinly easier
- Use a sharp chef’s knife to slice against the grain
- Cook quickly over medium-high heat to avoid drying it out
Thin slices = better texture and faster cook time, which is perfect for sliders.
💲 Budget-Friendly Alternatives to Ribeye
If ribeye isn’t in your weekly grocery budget, no worries—there are other delicious options that still make amazing philly cheesesteak sliders:
- Deli roast beef: Already sliced thin and super convenient
- Shaved steak: Pre-packaged at many grocery stores (often labeled “Philly-style beef”)
- Sirloin or flank steak: Flavorful and tender when sliced thin and against the grain
- Ground beef: A great option for families or picky eaters who prefer a looser meat filling
Just season well and don’t overcook lean cuts—they’re best when just cooked through.
🔪 Slicing Tips for Perfect Texture
Regardless of the cut you select, the way you slice it makes a difference:
| Cut Type | Slicing Direction | Why It Works |
|---|---|---|
| Ribeye, Sirloin | Thin slices against the grain | Makes meat more tender and less chewy |
| Flank steak | Very thin across grain | Breaks down muscle fibers for softness |
| Deli roast beef | Already sliced thin | Just warm lightly |
Pro Tip: If you’re buying steak in bulk, slice and freeze individual portions for easy future slider nights!
🥩 Can’t get enough Philly cheesesteak flavor?
Check out our Philly Cheesesteak Meatloaf — a hearty, cheesy spin on the classic meatloaf that’s packed with peppers, onions, and melty provolone in every slice.
Best Cheese and Bread for Philly Cheesesteak Sliders
No philly cheesesteak slider is complete without layers of melty cheese and pillowy, golden buns. Whether you’re a provolone purist or like to experiment with different breads, this part of the recipe brings the full cheesesteak experience together—mini style.
🧀 Best Cheese for Philly Cheesesteak Sliders
Cheese isn’t just a topping—it’s the glue that holds the sliders together and infuses each bite with creamy richness.
Here are the best options:
✅ Provolone Cheese (Classic Choice)
- Mild, slightly tangy, and melts smoothly
- Doesn’t overpower the beef and veggies
- Ideal for traditional cheesesteak flavor
✅ Mozzarella
- Super melty and stretchy
- Mild taste that complements bolder flavors
- Great for extra cheese pull effect
✅ Cheez Whiz or American Cheese
- Creamy, salty, and rich
- Classic for that authentic Philly street cart taste
- Spread on the bottom bun or drizzled on top for extra indulgence
✅ Pepper Jack (for heat lovers)
- Adds a spicy kick to each bite
- Pairs well with jalapeños or hot sauce versions
Tip: Use one layer of cheese on the bottom bun and another on top of the meat for maximum gooeyness in your philly cheesesteak sliders.
🍞 Best Bread for Cheesesteak Sliders
Buns matter! The right roll should be soft enough to bite through easily but sturdy enough to hold all the filling, cheese, and juice without falling apart.
Here are your top picks:
✅ Hawaiian Rolls
- Slightly sweet flavor contrasts the savory beef perfectly
- Soft texture that stays moist during baking
- Pull-apart style makes serving easy
✅ Slider Buns or Mini Brioche
- Rich and buttery flavor
- Holds up well to melted cheese and juicy fillings
- Ideal for a more “gourmet” feel
✅ Mini Hoagie Rolls (Split Top)
- For a more traditional Philly presentation
- Slightly crustier texture
- Great for open-faced sliders
Pro Tip: Keep the rolls connected when slicing and assembling—this helps them stay uniform and makes for cleaner layering.
Make-Ahead, Storage & Reheating Tips
Whether you’re prepping for a party or looking to batch-cook for busy weeknights, philly cheesesteak sliders are incredibly meal-prep friendly. With the right techniques, they can stay juicy, flavorful, and cheesy—even days later.
🕒 How to Make Philly Cheesesteak Sliders Ahead of Time
You can prep everything in advance to save time when it matters most.
✅ Make-Ahead Assembly Tips:
- Prepare the beef and veggies a day in advance and store them in the refrigerator.
- Slice and prepare the rolls in your baking dish
- Assemble sliders (meat, cheese, veggies) but hold off on baking
- Wrap tightly in foil and store in the refrigerator for up to 24 hours
- Bake right before serving for the freshest taste
Let the sliders sit at room temp for 15 minutes before baking to ensure even heating.
❄️ Storing Leftover Sliders
Sliders store surprisingly well—and can be enjoyed throughout the week.
| Storage Method | How-To |
|---|---|
| Refrigerator | Store in an airtight container for up to 4 days |
| Freezer | Wrap individually or in freezer-safe dish; freeze up to 2 months |
| Best practice | Cool completely before storing to prevent soggy buns |
Label freezer containers with the date so you know when to use them by.
🔥 How to Reheat Without Drying Out
No one wants dry sliders or rubbery cheese. Here’s how to reheat and keep everything soft and melty:
✅ Oven (Best Method)
- Wrap sliders loosely in foil
- Bake at 325°F (160°C) for 10–12 minutes
- Uncover for the last 2–3 minutes to crisp up the tops
✅ Microwave (Quick Fix)
- Place one or two sliders on a plate
- Cover with a damp paper towel
- Heat in 30-second bursts until warm
✅ Air Fryer (For Crispier Buns)
- Set to 300°F
- Heat for 5–6 minutes
- Great for bringing back that toasty top
Add a slice of fresh cheese before reheating for extra melt factor.
FAQ – Philly Cheesesteak Sliders
❓ How long is Philly cheesesteak good for?
Philly cheesesteak sliders can be stored in the refrigerator for up to 4 days when kept in an airtight container. Make sure to cool them completely before storing to avoid sogginess. For best flavor and texture, reheat before serving rather than eating them cold.
❓ What side goes with Philly cheesesteak sliders?
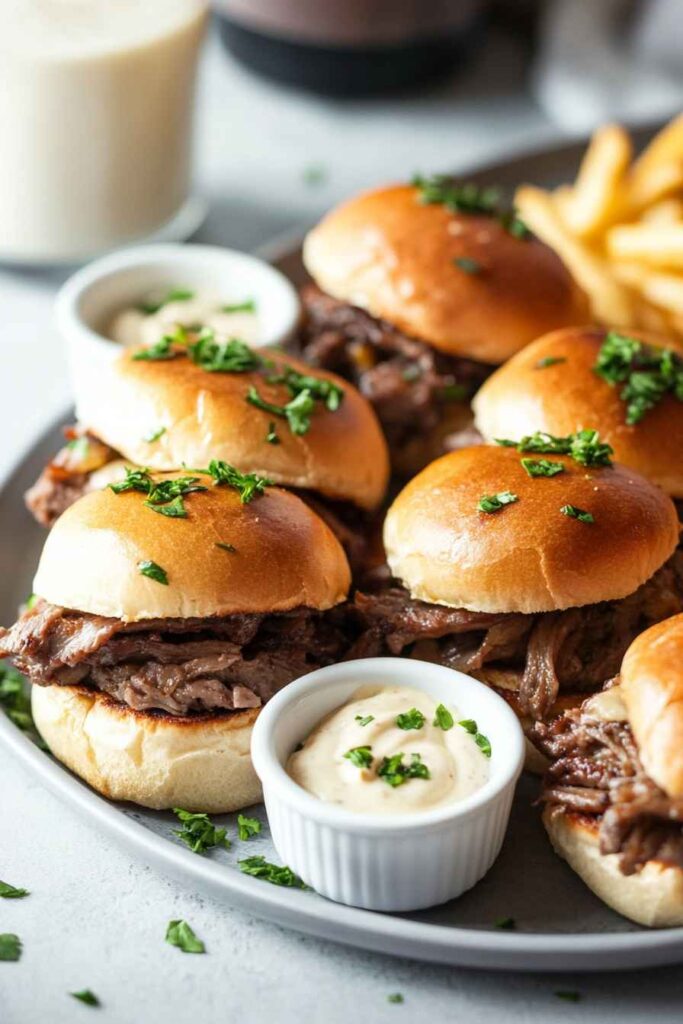
Great sides for philly cheesesteak sliders include crispy fries, coleslaw, potato salad, baked beans, or a simple green salad. For parties, pair them with dipping sauces like garlic aioli or cheese sauce and a refreshing mocktail or soda.
Don’t miss this bold pairing idea: Try our Watermelon Mocktail to balance the rich and cheesy sliders with fruity freshness.
❓ Can you reheat cheesesteak?
Yes, you can reheat cheesesteak sliders using the oven, air fryer, or microwave. For optimal results, reheat wrapped in foil at 325°F for 10–12 minutes. This method keeps the cheese melted and the buns soft without over-drying the meat.
❓ Can you put cheesesteak in the fridge?
Definitely! You can keep leftover Philly cheesesteak sliders in the fridge for up to 3–4 days. Use a sealed container to retain moisture and flavor. If possible, reheat with foil to keep them soft and gooey.
🍉 Looking for a refreshing drink to serve with your sliders?
Try our Watermelon Mocktail – it’s light, fruity, and the perfect way to balance the rich, cheesy flavors of your Philly cheesesteak sliders.
Philly Cheesesteak Sliders Recipe Card
Ingredients
- 1 lb thinly sliced ribeye or shaved steak
- 1 tbsp olive oil or butter
- 1 green bell pepper, thinly sliced
- 1 medium onion, thinly sliced
- 1 clove garlic, minced
- 12 Hawaiian rolls (keep connected)
- 6–8 slices provolone or mozzarella cheese
- 2 tbsp Worcestershire sauce
- ¼ cup beef broth (optional)
- 2 tbsp melted butter (for brushing)
- ½ tsp garlic powder (optional)
- Salt and black pepper, to taste
Instructions
- Preheat oven to 350°F (175°C).
- In a skillet, sauté peppers and onions in oil or butter until softened (6–8 minutes). Add garlic and cook for 1 more minute.
- Push veggies to one side; add steak, season with salt, pepper, Worcestershire sauce, and broth. Cook until browned (4–5 minutes).
- Without separating the rolls, slice them horizontally. Place the bottom half into a baking dish.
- Layer half the cheese, followed by the beef and veggie mixture, then top with remaining cheese. Cover with the top half of the rolls.
- Brush the tops with melted butter and sprinkle with garlic powder if using.
- Cover with foil and bake for 10 minutes. Remove foil and bake another 5–7 minutes until cheese is melted and tops are golden.
- Let rest for 3 minutes, slice between rolls, and serve warm!
Notes
- Ribeye is best, but deli roast beef or shaved steak works too.
- Assemble sliders ahead of time and bake when ready to serve.
- Use provolone, mozzarella, or mix cheeses for extra melt.
- Hawaiian rolls work great, but brioche buns are a tasty swap.
Conclusion
From game day to weeknight dinners, philly cheesesteak sliders are the ultimate crowd-pleasing recipe. With melty cheese, savory beef, and buttery buns baked to golden perfection, they check all the boxes for flavor, convenience, and comfort food satisfaction.
Thanks to their versatility, you can customize them with spicy add-ins, go low-carb, or prep them ahead for effortless entertaining. Whether you’re hosting a party or just craving something hearty and cheesy, these sliders deliver every single time.
🍽️ Looking for more delicious dinner ideas?
Browse our full Dinner Recipe Collection for hearty mains, comfort food classics, and easy weeknight meals your whole family will love!
🥤 And don’t forget to pair your sliders with the perfect drink.
Check out our Refreshing Drink Recipes — from fruity mocktails to sippable smoothies, they’re made to complement bold flavors like cheesesteak.
Now that you’ve got everything you need to make the best philly cheesesteak sliders, it’s time to preheat your oven and let the cheese pull magic begin. Happy cooking!


1 thought on “Philly Cheesesteak Sliders – The Ultimate Game Day & Party Favorite”